Authentication
Connect Power Platform ToolBox to your Dataverse environments securely. This guide covers all authentication methods, security features, and best practices.
Authentication Methods
Power Platform ToolBox supports three authentication methods for connecting to Dataverse environments:
Interactive Login (Recommended)
Best for: End users, interactive scenarios, MFA-enabled accounts
Interactive login uses Microsoft's OAuth 2.0 flow with the Microsoft Authentication Library (MSAL):
- Open the Connections panel
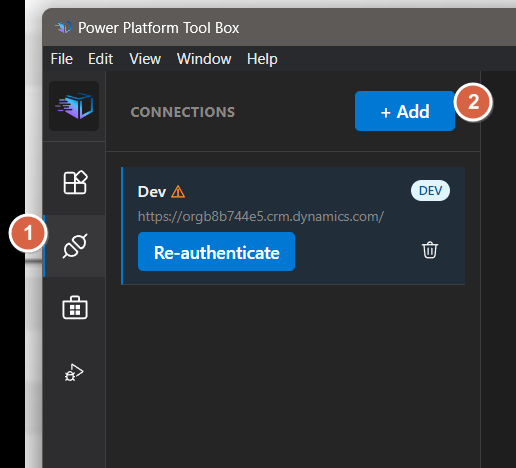
- Click "Add Connection" in the Connections panel
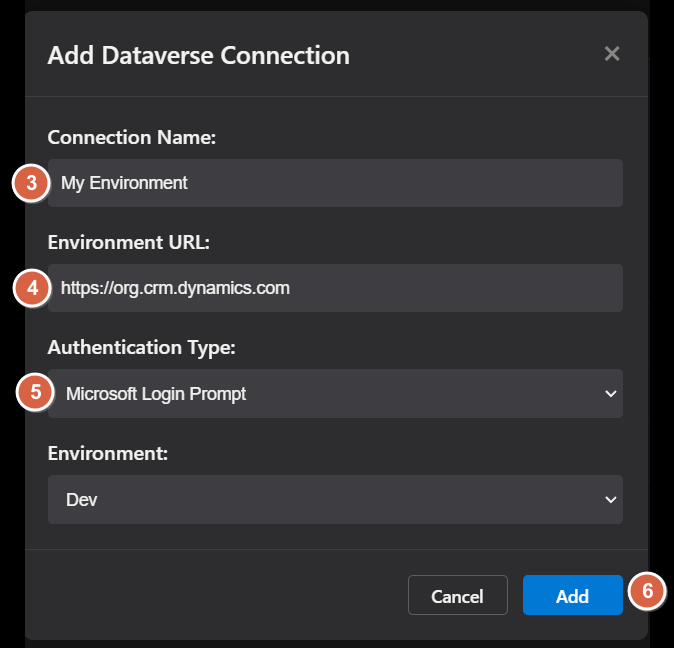
- Give your connection a name in Connection Name
- Enter your Environment URL (e.g.
https://org.crm.dynamics.com) - Ensure Authentication Type is set to Microsoft Login Prompt
- Click Add
- A browser window opens for Microsoft authentication
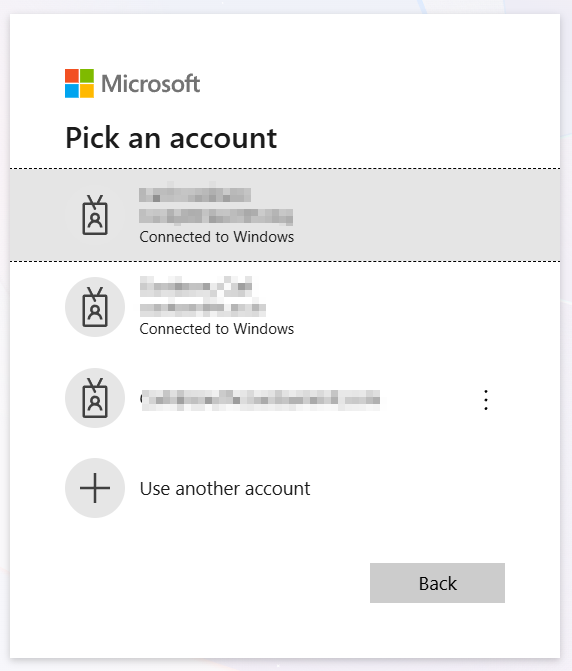
- Sign in with your credentials (MFA supported)
- Grant consent when prompted.
- An Authentication Successful message appears in the browser.

- Your connection is saved securely and is ready for use.
- You can manage your connections in the Connections Panel, including deletion.
Benefits:
- Most secure method
- Supports Multi-Factor Authentication (MFA)
- Supports Conditional Access policies
- No need to handle credentials
- Automatic token refresh
Interactive login is the recommended method for most users. It provides the highest security and best user experience.
OAuth App Registration
Best for: Automation, service principals, CI/CD pipelines, background processes
Use an Entra ID application registration with client credentials:
Prerequisites:
For detailed steps on registering an application in Entra ID and Dataverse, see:
Ensure you have the necessary permissions to register applications in your Entra ID tenant. This should only be done with consent of the Entra tenant owner.
Register app in Entra ID:
- Go to Entra Portal and select App registrations
- Click "New registration"
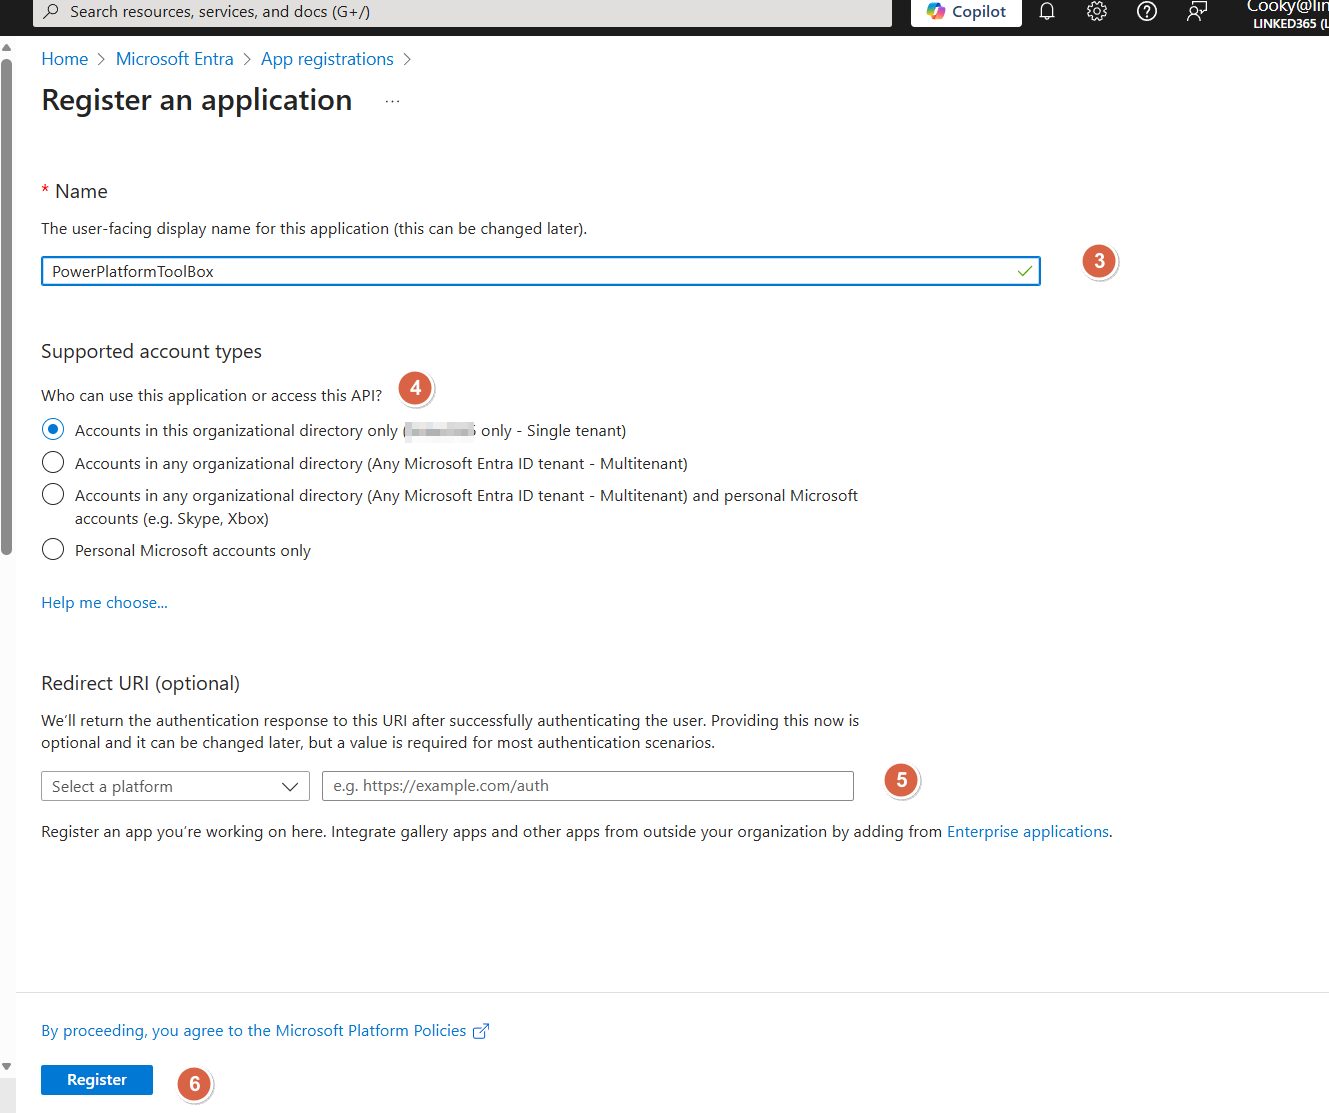
- Provide an appropriate name such as
PowerPlatformToolBox(or your choice) - Select a supported account type: Choose an appropriate option. Recommended "Accounts in this organizational directory only"
- Leave Redirect URI blank
- Click "Register"
Configure API permissions:
- In your app registratin page, select API permissions
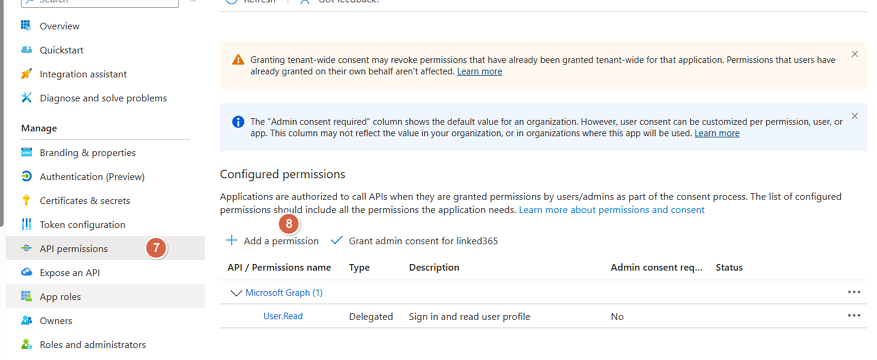
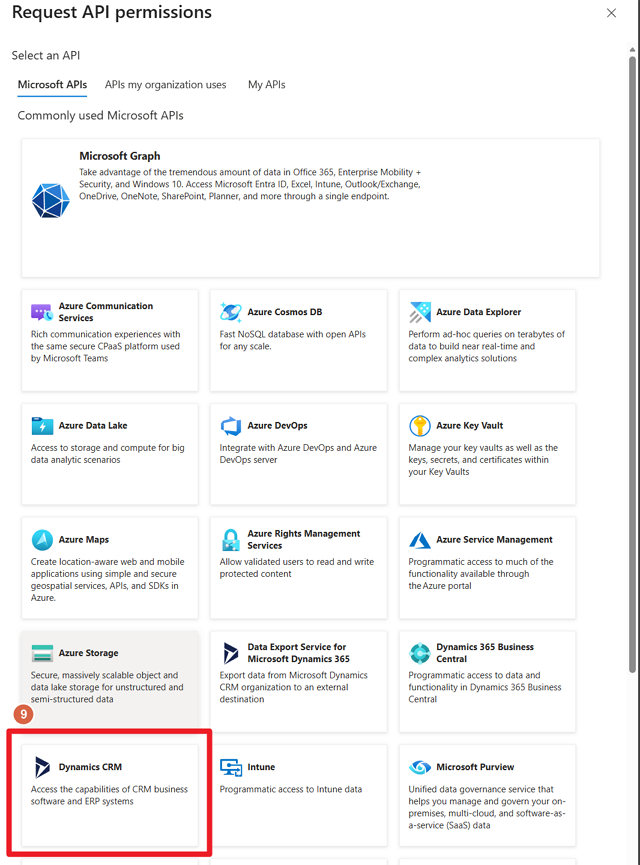
- Select Add a permission
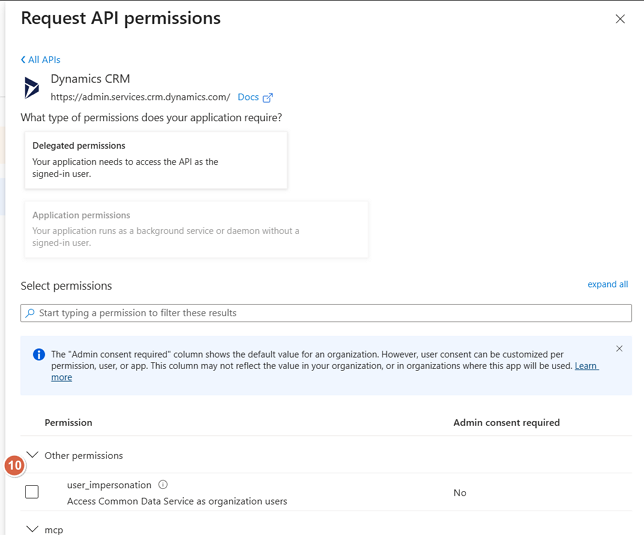
- Add "Dynamics CRM"
- Select user_impersonation then Add permissions
- Select "Grant admin consent for [Your Tenant]"
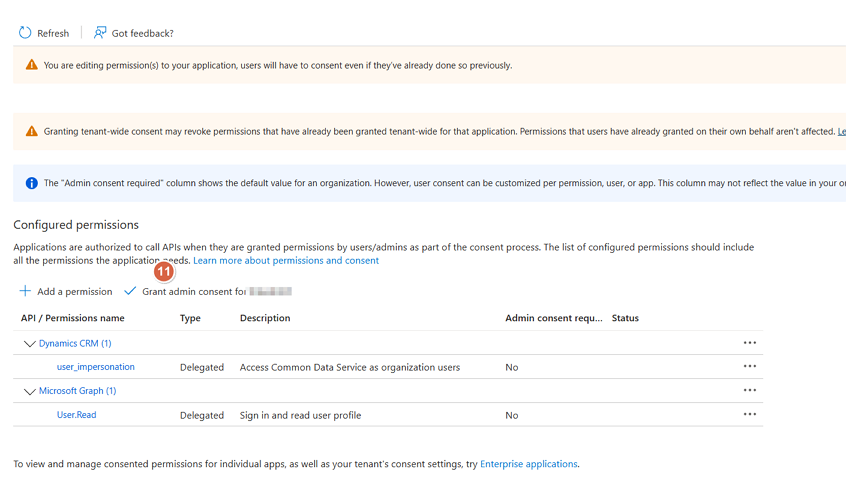
- Confirm by clicking Yes
Create client secret:
- Select Certificates & secrets
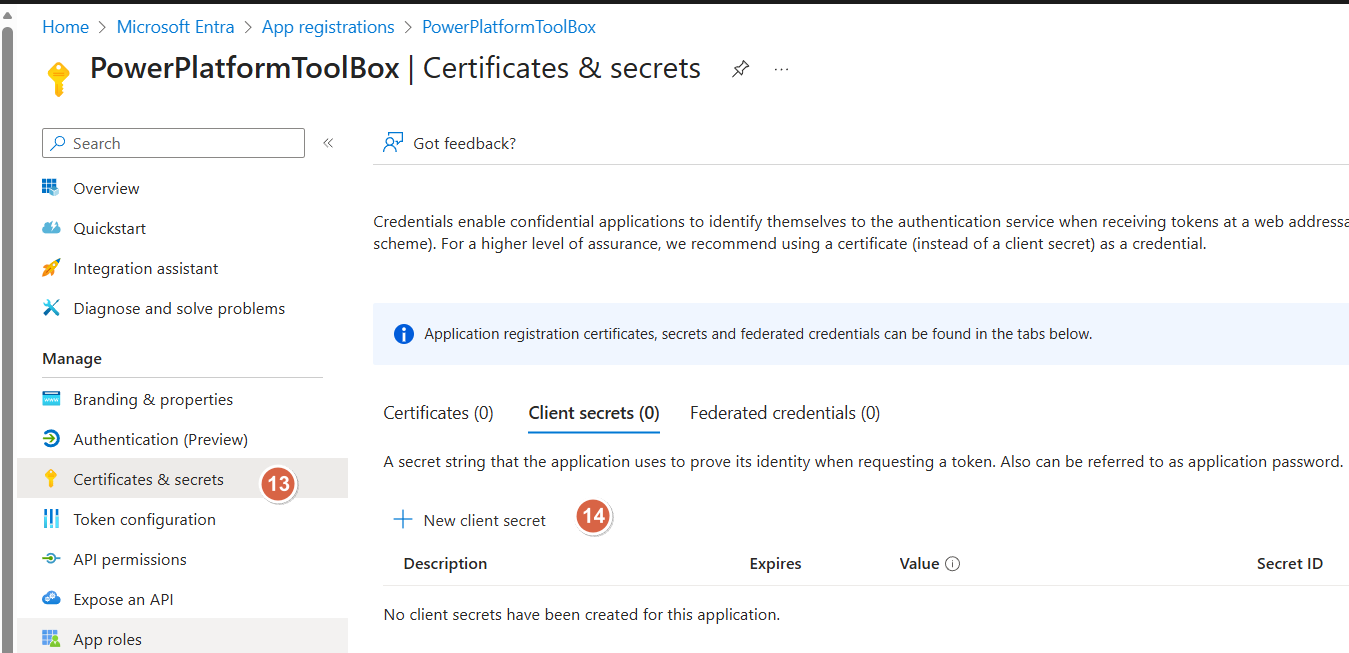
- Click New client secret
- Provide a description (e.g. "PPTB Secret")
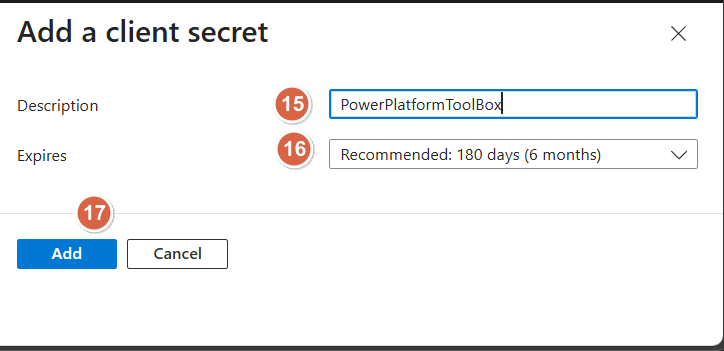
- Select an expiration period, keep as short as possible
- Click Add
- Copy the secret value immediately, you won't be able to see it again
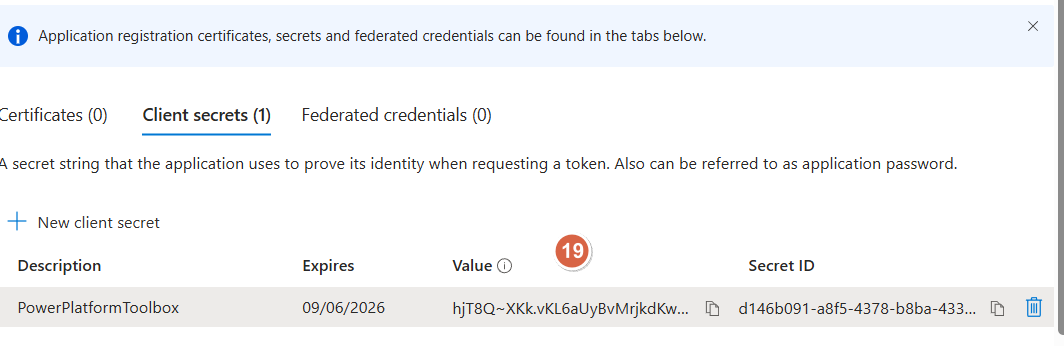
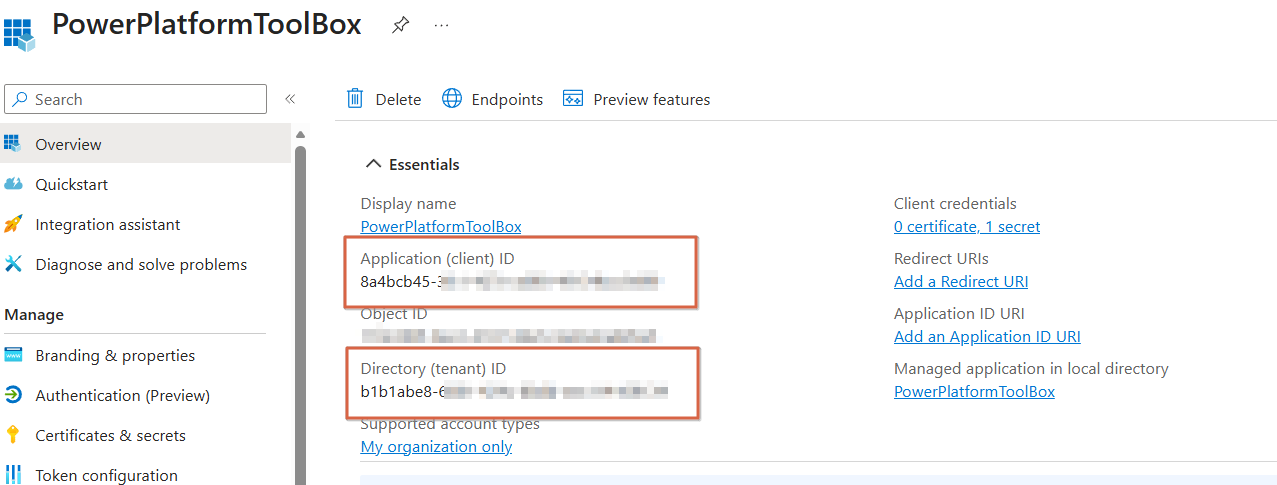
- You will also need the Application (client) ID and Directory (tenant) ID from the app overview page.
Store the client secret securely. If compromised, it can be used to access your Dataverse environment.
Configure App user in Dataverse:
- In Power Platform Admin Center, navigate to your environment
- Go to Users
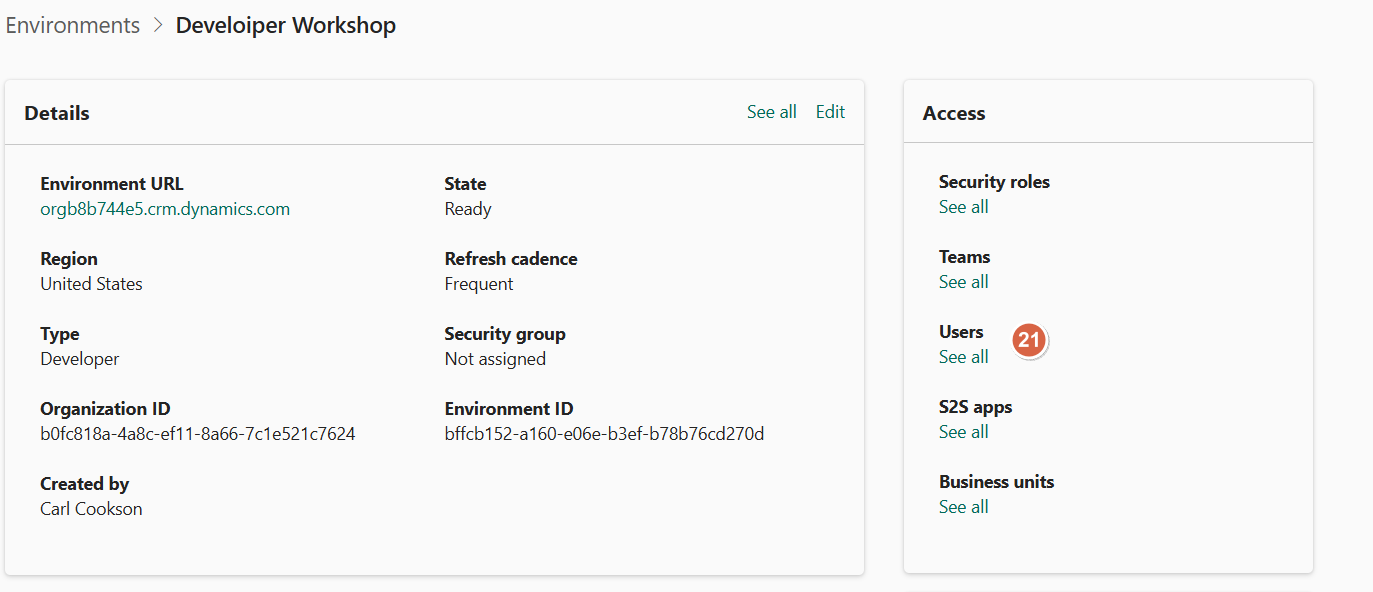
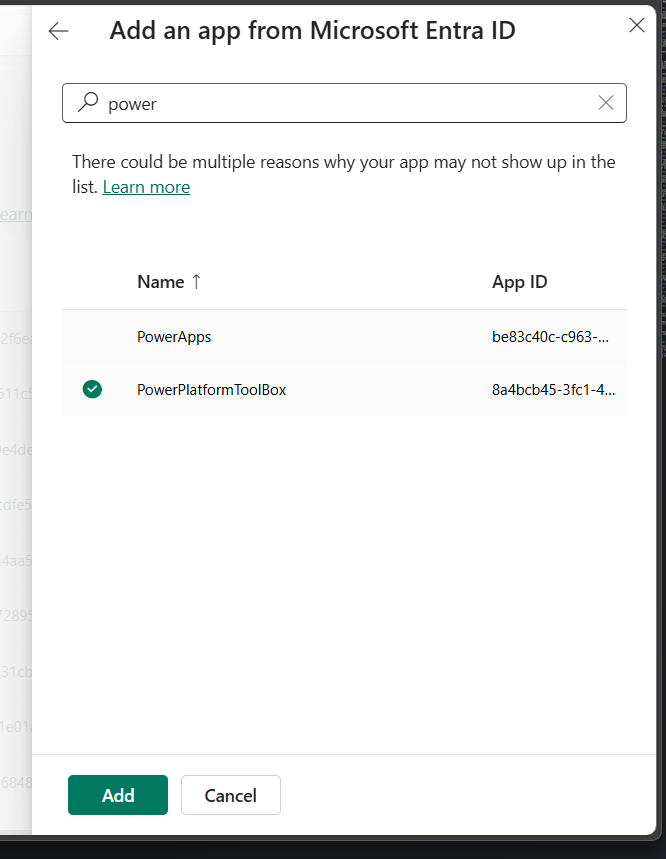
- Select New app user & Add an app
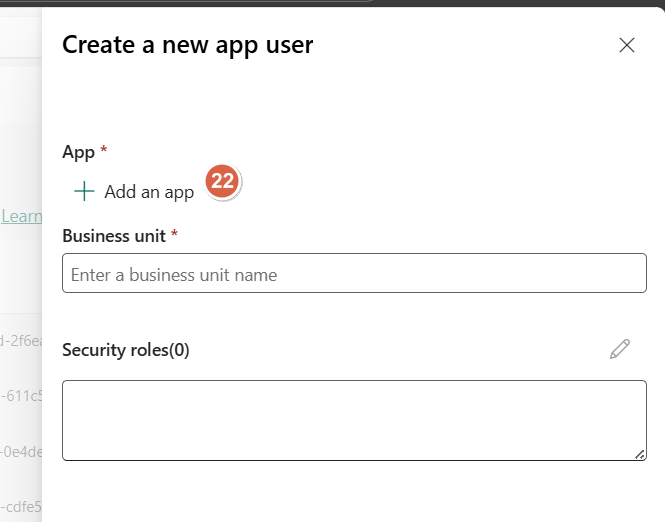
- Search for and select your registered app
- Enter an appropriate business unit and select edit on the security roles.
- Assign necessary security roles. This should be as minimal as possible, particularly in production environments.
- Once complete, select Create
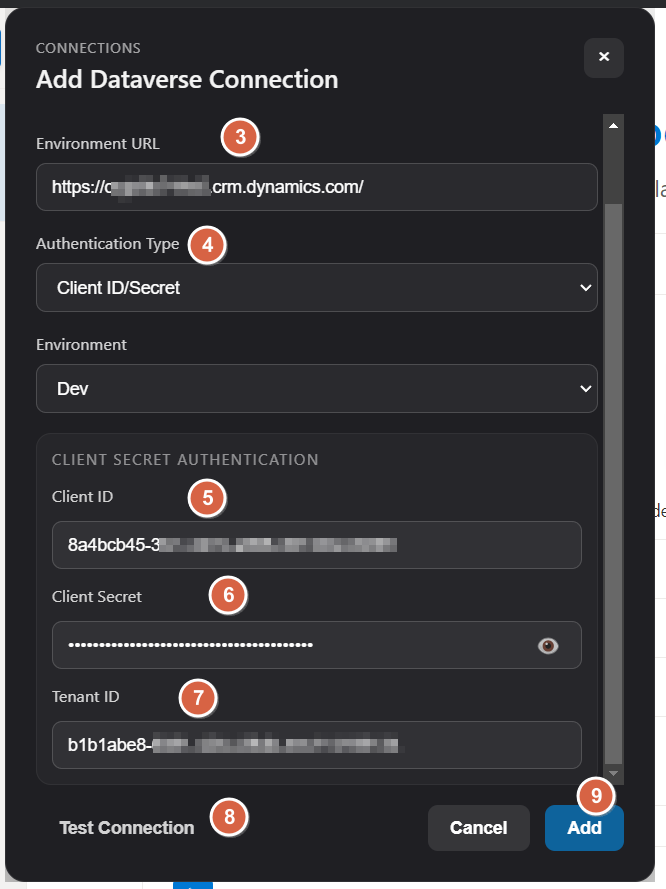
Configure Power Platform ToolBox:
- In Power Platform ToolBox, open the Connections panel and select Add
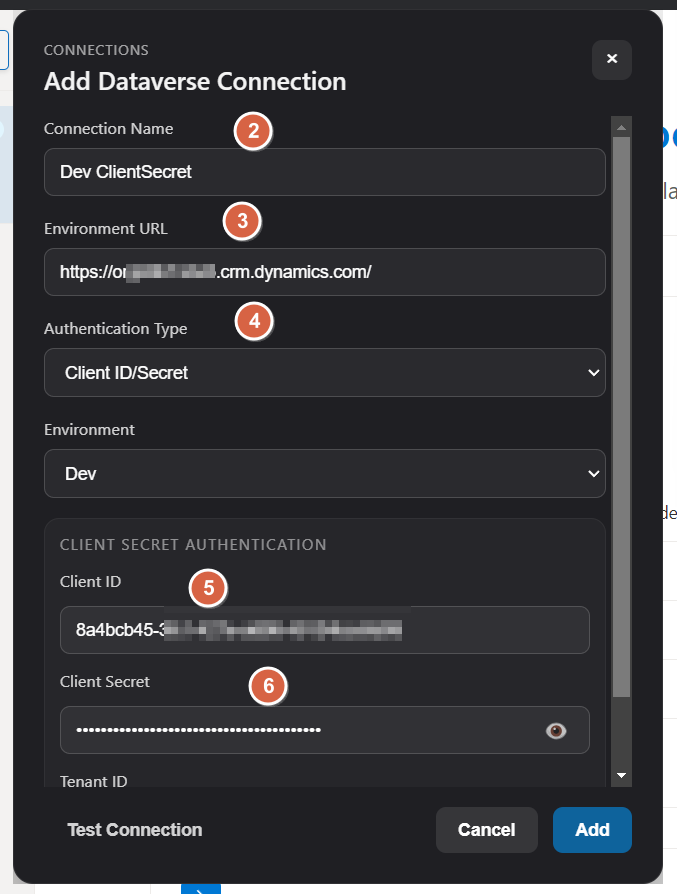
- Configure an appropriate connection name
- Enter your Environment URL (e.g.
https://org.crm.dynamics.com) - Select Authentication Type: Client ID/Secret
- Enter the Client ID you saved earlier
- Enter the Client Secret you saved earlier
- Enter the Tenant ID you saved earlier
- Select Test, if all is correct you will see a success message
- Click Add to save the connection securely
Benefits:
- Suitable for automation
- No interactive prompts
- Service principal support
- Fine-grained permissions
Store tenant, client id & client secrets securely. Never commit them to source control or share them publicly.
Username/Password
Best for: Development, testing, POC scenarios
Not recommended for production use.
This method:
- Cannot bypass MFA
- Does not support Conditional Access
- Requires storing credentials
- May violate security policies
Direct authentication with username and password:
Setup:
Environment URL: https://org.crm.dynamics.com
Auth Method: Username/Password
Username: [email protected]
Password: your-password
Use this method only for:
- Local development environments
- Testing and proof-of-concepts
- Environments without MFA requirements
Security Features
Encrypted Storage
All sensitive credentials are encrypted using OS-native secure storage:
- macOS: Keychain
- Windows: DPAPI (Data Protection API)
- Linux: libsecret
Encrypted fields:
- Client ID
- Client Secret
- Access Token
- Refresh Token
- Password
Automatic Migration
If you're upgrading from an older version:
- Plain-text connections are automatically encrypted on first launch
- No manual intervention required
- Backwards compatible
Token Management
- Access tokens automatically refreshed before expiration
- Refresh tokens securely stored and rotated
- Failed refresh triggers re-authentication
- No plaintext token storage
Managing Connections
Add Connection
- Click "Add Connection" button
- Fill in connection details
- Select authentication method
- Click "Connect"
- Complete authentication flow
Edit Connection
- Right-click connection in list
- Select "Edit"
- Modify details (name, URL, etc.)
- Re-authenticate if changing credentials
Delete Connection
- Right-click connection in list
- Select "Delete"
- Confirm deletion
- Encrypted credentials are securely removed
Set Active Connection
- Click on a connection in the list
- Connection becomes active
- Tools use the active connection
- Active connection highlighted in UI
Multiple Connections
Some tools may require multiple connections to different Dataverse environments. Power Platform ToolBox supports managing and using multiple connections seamlessly.
If the tool is configured for multiple connections, a different connection screen will be displayed, allowing selection of both connections.
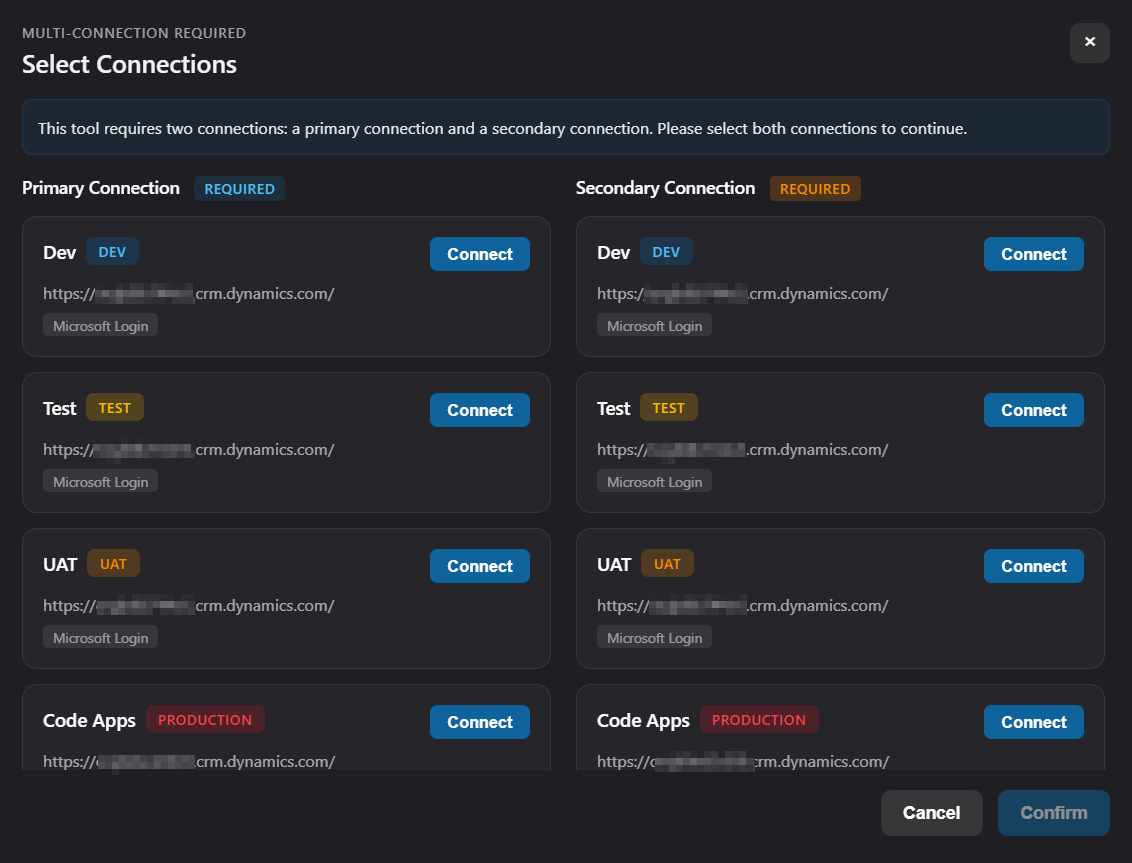
Utilise the connect buttons on both sides of the pane to select the appropriate connections for each environment. Select confirm once both connections are connected to open the tool.
The footer will display both active connections for reference while using the tool. Appropriate colours for the environments will also be shown as a border for the tool to give a visual indication.

Troubleshooting
Connection Failed
Symptom: "Failed to connect" error
Solutions:
- Verify environment URL is correct
- Check network connectivity
- Ensure credentials are valid
- Verify app registration permissions (OAuth)
- Check MFA/Conditional Access policies
Token Expired
Symptom: "Unauthorized" or "Token expired" error
Solutions:
- PPTB automatically refreshes tokens
- If refresh fails, re-authenticate
- Check refresh token is not revoked
- Verify app registration is not disabled
MFA Required
Symptom: "MFA required" error with username/password
Solution:
- Use Interactive Login instead
- Username/password cannot bypass MFA
- Configure OAuth app registration for automation
Insufficient Permissions
Symptom: "Access denied" or "Insufficient privileges"
Solutions:
- Verify user has necessary security roles in Dataverse
- Check app registration API permissions (OAuth)
- Ensure admin consent granted for app permissions
- Review Dataverse security settings
Best Practices
For End Users - Use Interactive Login - Enable MFA on your account - Don't share connections - Review active connections regularly
For Developers - Use OAuth for automation - Rotate client secrets regularly - Use service principals for CI/CD - Never commit credentials to code
For Administrators - Enforce MFA policies - Use Conditional Access - Review app registrations - Audit connection usage